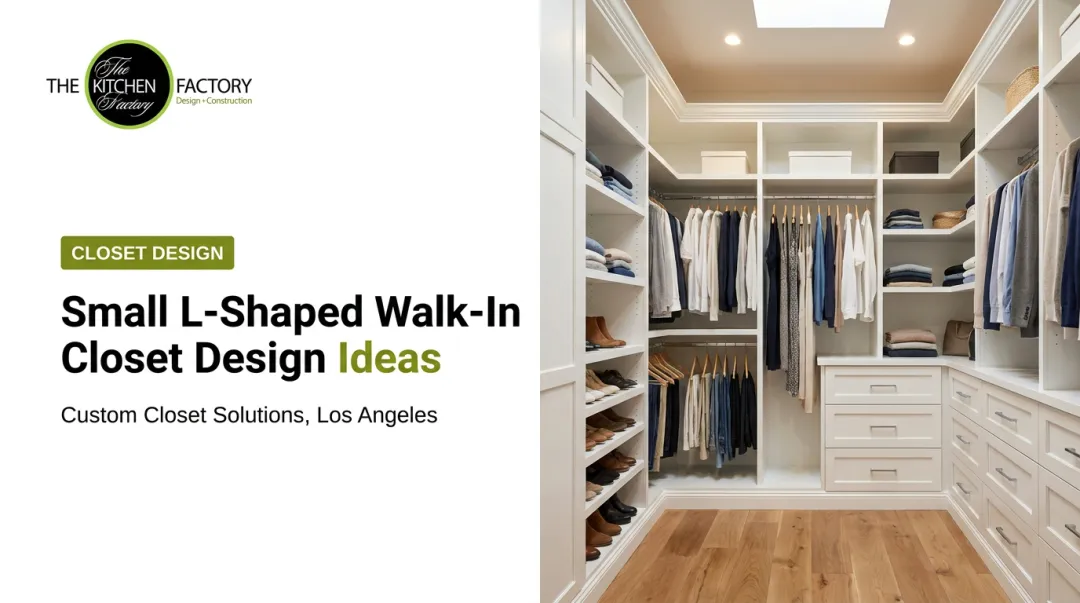
A well-designed walk-in closet solves this. Done right, it functions as a personal dressing room — calm, efficient, and tailored to how you actually live. Done poorly, it creates a different kind of chaos behind a closed door.
This guide walks through four planning steps: wardrobe assessment, space measurement, zone-based storage design, and material and finish selection. Whether you're starting from scratch or redesigning an existing space, this framework will help you avoid the most costly mistakes before a single cabinet is ordered.
Key Takeaways
- Inventory your full wardrobe — including shoes, bags, and off-season items — before designing anything
- Measure carefully: small errors lead to drawers that won't open and rods that clip clothing
- Zone your storage around how you actually get dressed, not how the space looks on a mood board
- Material quality and layered lighting determine how long the closet stays functional and beautiful
- Poor lighting, rigid shelving, and wasted vertical space are planning failures — not budget ones
Step 1: Start With a Full Wardrobe and Lifestyle Assessment
Skipping this step produces closets that photograph beautifully but fail within six months. The layout has to be driven by what you actually own and how you actually get dressed — not by inspiration images alone.
Take a Complete Inventory of What You Own
Before measuring the room, measure your wardrobe. This means a physical audit:
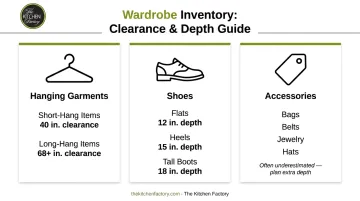
- Hanging garments: Count total items and note garment lengths. Short-hang pieces (shirts, folded pants, blazers) need about 40 inches of vertical clearance; long-hang pieces (dresses, coats, suits) need 68 inches or more. This distinction directly controls how many rods you need and where they sit.
- Shoes: Count every pair, including boots. Note how many are tall boots requiring 18 inches of shelf depth versus flats requiring 12 inches.
- Accessories: Bag count, belt count, jewelry volume, hats. These are almost always underestimated and end up creating the most visible clutter when not planned for.
Also pull in items currently stored elsewhere: guest room closets, under-bed bins, basement shelving. Those items belong in your primary closet if you use them regularly. A simple spreadsheet tracking item category, quantity, and estimated space requirement takes 30 minutes and will save costly rework later.
Define How You Want to Use the Space
Beyond inventory, ask yourself a few practical questions:
- Is this a shared closet? If so, whose wardrobe takes priority at the entrance?
- Do you prefer a quick, efficient morning routine or a slower boutique-style dressing experience?
- Do you want to lay out tomorrow's outfit the night before?
- Is a vanity, seating, or full-length mirror important?
The answers determine more than aesthetics — they determine where zones go, how wide the central walkway needs to be, and whether specialty features like a valet rod or island bench belong in the plan.
Frequently worn items belong near the entrance at the most accessible height. Seasonal and occasional pieces move to back sections and high shelves. Getting this hierarchy right before design begins is what separates a closet that stays organized from one that devolves into clutter within a season.
Step 2: Measure Your Space and Choose the Right Layout
Even small measurement errors cause real problems — drawers that can't open fully, rods placed too close to the wall that clip shoulders off hanging garments, corners that go entirely to waste. If you're working with a professional design team, this step is handled with precision. If you're planning independently, expect to take careful measurements across multiple passes.
Key Dimensions Every Walk-In Closet Needs
Use these benchmarks as your planning baseline:
| Element | Standard Dimension |
|---|---|
| Central walkway | 36 inches minimum; 42 inches preferred |
| Hanging depth (rod to back wall) | 24 inches |
| Shelf depth for folded items/flats | 12–15 inches |
| Shelf depth for boots | 18 inches |
| Drawer depth | 14–24 inches with 24–30 inches pull-out clearance |
| Long-hang single rod height | 68–72 inches |
| Upper double-hang rod | 80–82 inches |
| Lower double-hang rod | 40 inches |
Ceiling height matters too. Higher ceilings allow stacked rods and upper display shelves that would otherwise be impossible.
Spaces as compact as 4×8 feet can function well with vertical stacking, slim drawer units, and careful feature prioritization. The most wasted areas in small walk-ins are corners — address these deliberately with angled shelves or rotating units rather than letting them become dead space.
Four Layout Styles and When to Use Each
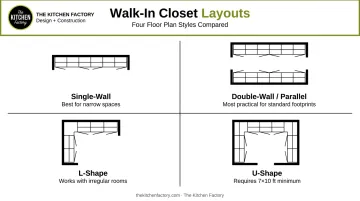
- Single-wall: Best for narrow spaces; keeps everything on one run of cabinetry
- Double-wall/parallel: Two facing walls with a central aisle — efficient and highly practical for most standard walk-in footprints
- L-shape: One wall handles hanging, the adjacent wall takes shelving and drawers; works well when the room has an irregular shape or natural light on one side
- U-shape: Maximum storage on three walls, but requires at least 7×10 feet for comfortable movement; best suited to primary bedroom suites
These layouts also mix well. An L-shape with a partial fourth wall or a double-wall with an island at one end are both common configurations. Before committing, factor in door swing direction, natural light sources, and whether a seating area or island is part of the plan.
One practical trick before committing: tape the layout on the floor with painter's tape. It takes 20 minutes and reveals scale and flow issues that no floor plan can.
Step 3: Design Functional Storage Zones
Zone-based design keeps a closet functional past the first week. Divide the space into primary zones (everyday items near the entrance), secondary zones (occasionally used items mid-section), and seasonal storage (back walls and high shelves). This mirrors how people naturally move through a closet.
Hanging, Shelving, and Drawer Allocation
Rod placement by garment type:
- Upper double-hang rod: 80–82 inches from the floor
- Lower double-hang rod: 40 inches (shirts, folded pants)
- Single long-hang rod: 68–72 inches (dresses, coats, suits)
Maximizing double-hang configurations nearly doubles the hanging capacity on any given wall. If a wardrobe is heavy on shirts and blazers, prioritize double-hang sections over single-rod long-hang sections.
On drawers vs. open shelves: Most items — socks, activewear, t-shirts, pajamas, belts, folded jeans, sweaters — store more efficiently in drawers than on open shelves. Drawers reduce visual clutter, make retrieval faster, and protect folded items from dust.
Plan for as many drawers as the budget allows, and add divider inserts to keep them functional.
Open shelves work well for items you want to see at a glance: shoes, bags, and folded sweaters displayed by color. Standard shelf spacing runs 12 inches apart for folded items and baskets, and 14–16 inches for bags and larger accessories.
Adjustable vs. fixed shelving: Adjustable systems accommodate a wardrobe that evolves over time. Fixed systems cost less but only work well when storage needs are carefully mapped in advance. A hybrid — fixed cabinetry with a few adjustable shelf sections — balances cost and flexibility for most projects.
Shoe Storage and Specialty Features
Shoe storage depth requirements vary by type:
- Flats and sandals: 12 inches
- Heels: 15 inches
- Tall boots: 18 inches
Display-style open shoe shelving creates a boutique feel and keeps pairs visible. Pull-out shoe racks solve the back-row problem — without them, shoes stored two rows deep are effectively inaccessible.
Specialty features worth planning early:
- Valet rod: Pull-out rod for laying out the next day's outfit; adds almost nothing to the footprint
- Pull-out hamper: Keeps laundry contained without occupying floor space
- Jewelry drawer inserts: Velvet-lined dividers protect pieces and make the drawer functional, not just decorative
- Built-in island or bench: For larger closets (typically 8×10 feet or more), an island adds both surface area and additional drawer storage beneath
The Kitchen Factory's design team — with over 30 years of experience designing custom closets and kitchens across greater Los Angeles — consistently recommends mapping all specialty features onto the plan before cabinetry is specified. Retrofitting a valet rod or pull-out hamper after installation is far more expensive than planning for it from the start.
Step 4: Select Materials, Lighting, and Finishes
Cabinetry Materials and Finish Options
Three materials dominate closet cabinetry:
- Solid wood: Beautiful and high-end, but prone to warping in variable humidity and significantly heavier. Best suited to accent pieces rather than full closet builds.
- Melamine: Affordable, easy to clean, and widely available — but the visual result can look flat, and the surface is more susceptible to chipping at edges over time.
- Thermally fused laminate (TFL): Resin-saturated decorative paper fused to a particleboard or MDF core. Offers excellent scratch and wear resistance across a wide range of finishes.
According to the Composite Panel Association, TFL's durability, finish consistency, and variety make it the most practical choice for most closet builds.
Hardware choice has an outsized effect on the finished look. A TFL cabinet in a warm white finish with brushed gold pulls reads entirely differently than the same cabinet with matte black hardware. Matching hardware finishes to the bedroom's existing palette creates cohesion without additional cost.
Lighting and Mirrors
Lighting is consistently the most underestimated element in closet design. Dark corners mean mismatched colors, missed items, and a space that feels smaller than it is.
A layered approach works best:
- Ambient overhead fixtures for general illumination
- LED strips under shelves or inside rod sections to eliminate shadow at the hanging zone
- Task lighting near the accessory and jewelry area where color accuracy matters most
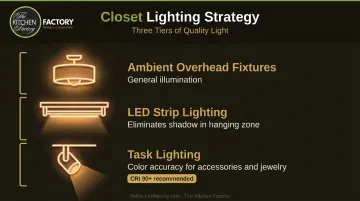
For color matching specifically, industry lighting guidance recommends fixtures with a CRI (Color Rendering Index) of 90 or higher — this ensures that navy reads as navy under artificial light, not black.
Full-length mirrors serve two purposes. Functionally, they eliminate the need to leave the closet to check a full outfit. Visually, research on mirror placement in interior design shows that large mirrors along a wall can effectively double the perceived size of a narrow or compact space.
In smaller walk-ins, a mirrored door or a floor-to-ceiling mirror on the back wall delivers more visual impact than almost any other single finish decision.
Common Walk-In Closet Planning Mistakes to Avoid
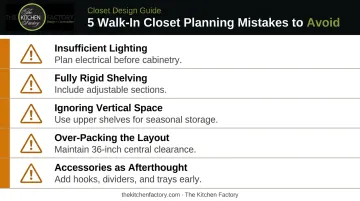
Most closet redesigns trace back to a handful of avoidable planning failures:
1. Insufficient lighting Dark corners make color-matching impossible and create the impression that the closet is perpetually disorganized. Budget for layered lighting before cabinetry is specified — electrical work done after installation is expensive.
2. Fully rigid shelving A wardrobe changes. New categories emerge, garment proportions shift, storage needs evolve. Closets built entirely from fixed shelving may feel inadequate within a few years. Build in at least a few adjustable sections.
3. Ignoring vertical space The wall real estate above the highest rod and near the ceiling is almost always wasted in under-planned closets. That zone is ideal for seasonal items, archive-level storage, or open display shelving. A step stool makes it accessible; a pull-down rod system makes it practical for active use.
4. Over-packing the layout Fitting maximum storage onto every wall sounds efficient on paper. In practice, a closet where you can barely turn around isn't a dressing room — it's just a different kind of chaos. Maintain at least 36 inches of central clearance.
5. Treating accessories as an afterthought Belts, jewelry, folded scarves, sunglasses — these small items generate the most visible daily clutter when they don't have a dedicated home. Hooks, velvet-lined trays, drawer dividers, and small bins take up minimal space and have a disproportionate impact on how organized the closet looks and feels.
The best closets aren't just organized for today — they're built to adapt. Even one modular section or a few movable shelves can make the difference between a space that still works five years from now and one that needs a full redo.
Frequently Asked Questions
How do I plan a walk-in closet?
Start with a full wardrobe inventory, then measure the space accurately. Choose a layout that fits both the room's footprint and your daily routine, then design storage zones before selecting finishes or accessories — skipping the inventory step leads to layouts that look right but function poorly.
What are must-have features in a walk-in closet?
Double-hang rods, adjustable shelving, built-in drawers with dividers, dedicated shoe storage, layered lighting, and at least one full-length mirror. These are the functional baseline for a closet that holds up to daily use, not optional upgrades.
What is the 80/20 wardrobe rule and how does it apply here?
You wear roughly 20% of your clothes 80% of the time. Apply it spatially by placing that frequently-used 20% in the prime zone near the entrance at the most accessible height. Less-worn items belong in back sections and on higher shelves.
What is the minimum size for a walk-in closet?
A functional walk-in typically starts around 4×6 feet, though this limits layout options. A 5×8 to 6×8 foot footprint allows a comfortable central walkway plus storage on two or three walls, which is where most designs really begin to function well.
How do I maximize storage in a small walk-in closet?
Three strategies: maximize vertical height with stacked rods and upper shelving, use double-hang configurations wherever garment lengths allow, and prioritize drawers over open shelving to increase storage density while reducing visual clutter.
Should I choose open shelving or closed cabinets?
Open shelving works well for display items — shoes, bags, folded sweaters — where visibility is an asset. Closed cabinets and drawers suit smaller accessories and anything that creates clutter when visible — most well-designed closets use both.